How to wireframe your website copy. A step-by-step guide
4 min. readWith this guide you’ll learn how to work on user experience and copywriting together for your website. Follow these 7 easy steps and you'll be off to a good start!
It’s not very common to think about UX and copy as two sides of the same coin. More often than not, UX is a phase in the design process and copywriting is a totally different one — something that comes later in the process and is disconnected from the other steps.
One way to work on UX and copywriting together is to learn to wireframe your copy. I wrote about the why and the benefits of wireframing copy. Here I’ll show you how to do it, with a step-by-step guide and examples from projects I worked on.
1. Wireframing comes last
You don't want to jump into wireframing as soon as you start a project. You know 80% of the work is research and gathering the data you need to write your copy. That's what should always come first.
And even once you've got your research done, you shouldn't write your copy directly into the wireframes right away. That would be like multitasking. Writing copy and thinking about all the design principles takes 2 different thought processes.
We humans are not good at that. This is why you should...
2. Write your draft in a text document
I start getting an idea for the structure I want to give the copy in Google Docs. Using good formatting and tables is pretty much all you need.
To get ideas for the layout of each section, I use sites like Dribbble and generally keep a swipe file of good designs, especially ones that worked in converting me.
As a rule of thumb for deciding on layout and copy placement, always ask yourself these 3 questions:
- What does my potential customer/user expect to see on the page?
- What do they need to see to move forward?
- How should I present this information to them, so they can consume it as easily as possible?
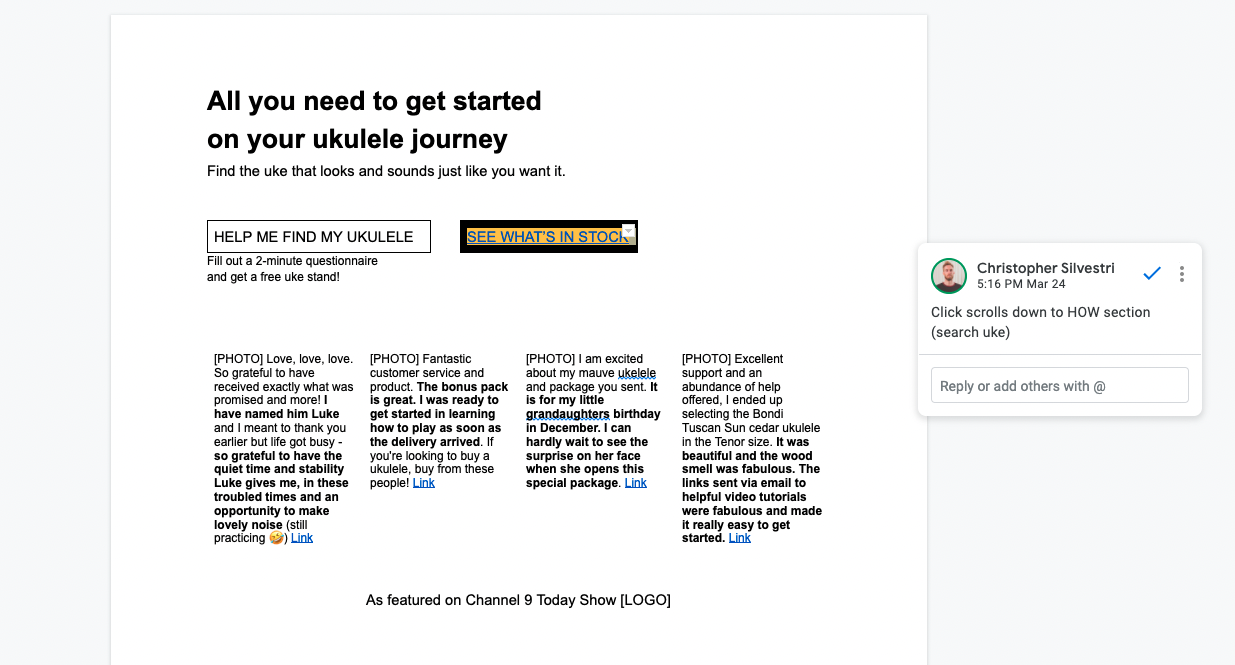

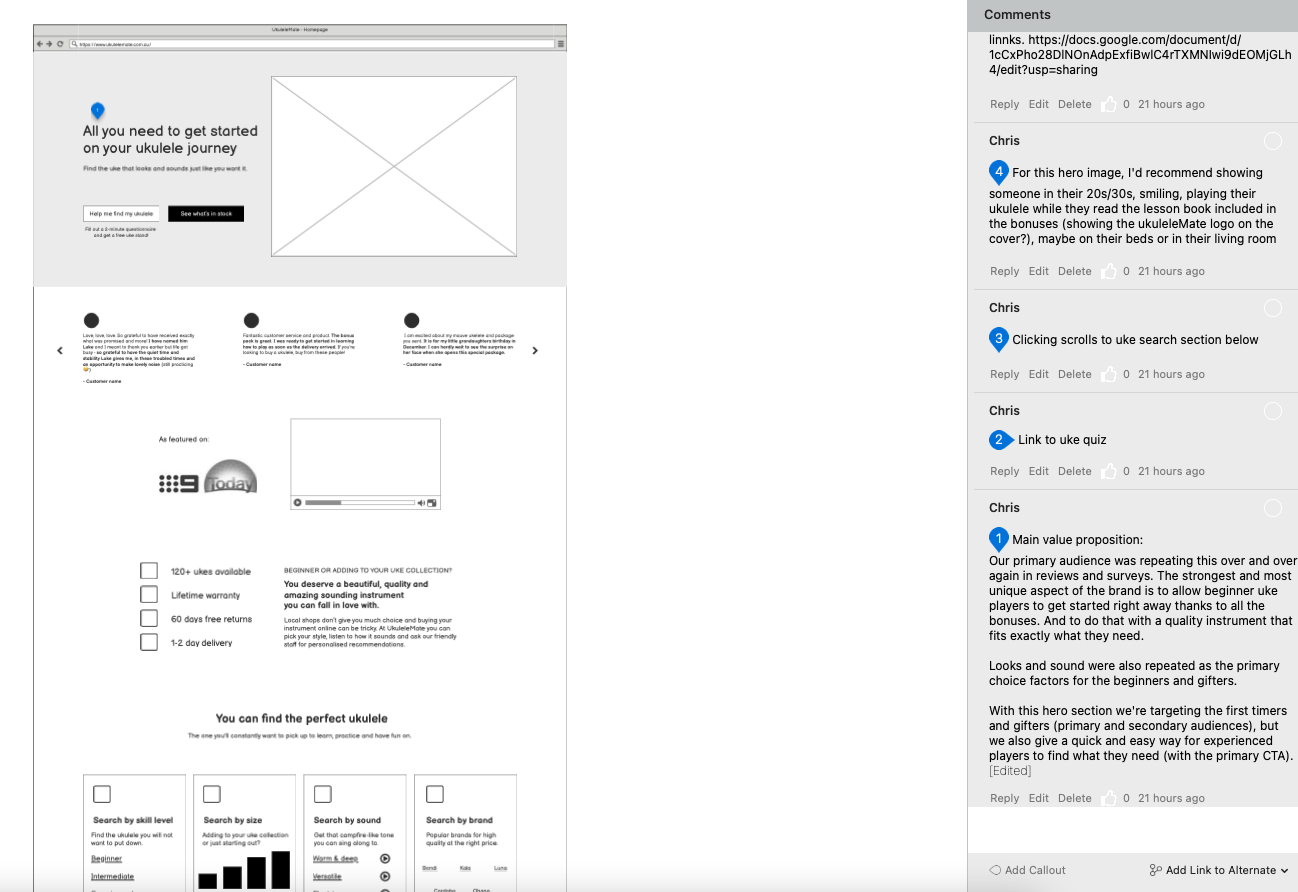
Often I will also add comments on the Google Doc to specific sections of the copy to provide more context. These comments can be anything from ideas on functionality or alternative copy and testimonials.
3. Pick your tool and get your wireframing library ready
When you're wireframing, you don't want to think about the technicalities of using a specific tool. You should be able to think of a visual element, and add it to your wireframe in 1 or 2 clicks.
Being efficient will allow you to keep your focus on the copy. That’s where having templates or a library of visual elements ready to use in your platform of choice comes in.
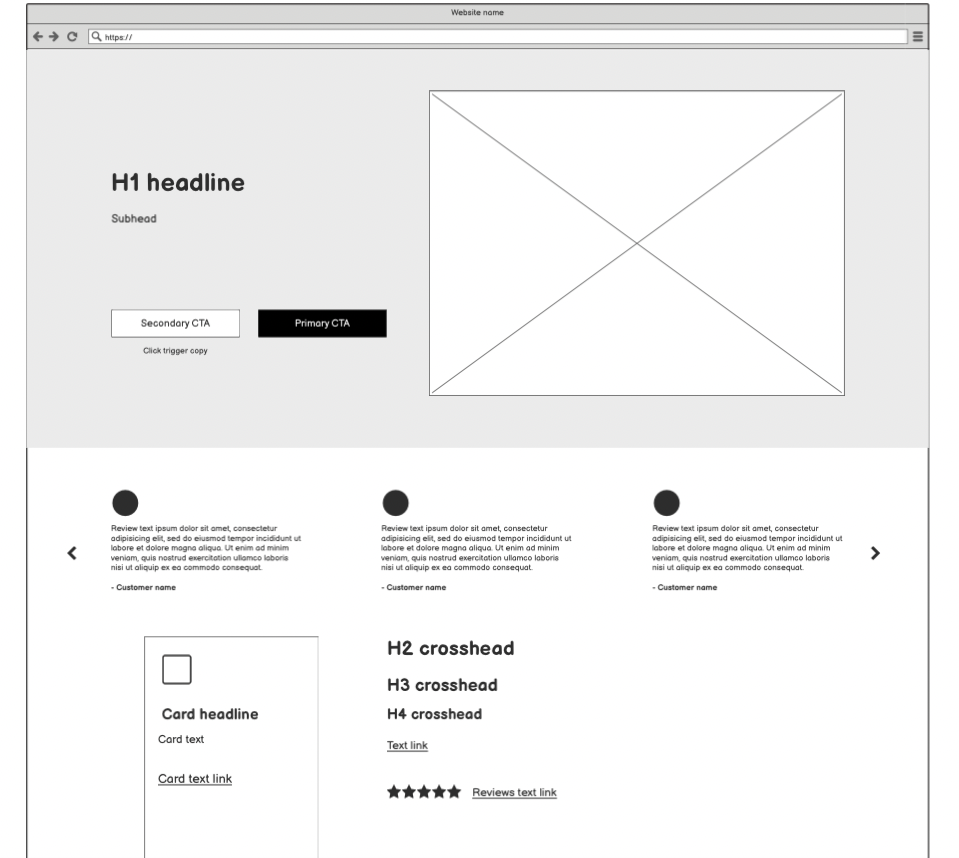
I created an eCommerce Template in Balsamiq as an example. Just search for "E-Commerce Article Example" in Quick Add to use it.
4. Translating the text document into a wireframe
Once you have your copy document ready and roughly pre-structured, it is time to move it into a wireframe.
I always start with a width of 1440 pixels for my page and keep it fairly long to start (5000 pixels). Here it's important to also create a content container for your copy. I usually go with around 1200px.
To do this in Balsamiq I just add a rectangle, lock it in place, and whenever I need to see the container lines, just turn the border from hidden to ‘Square’ from the Inspector:
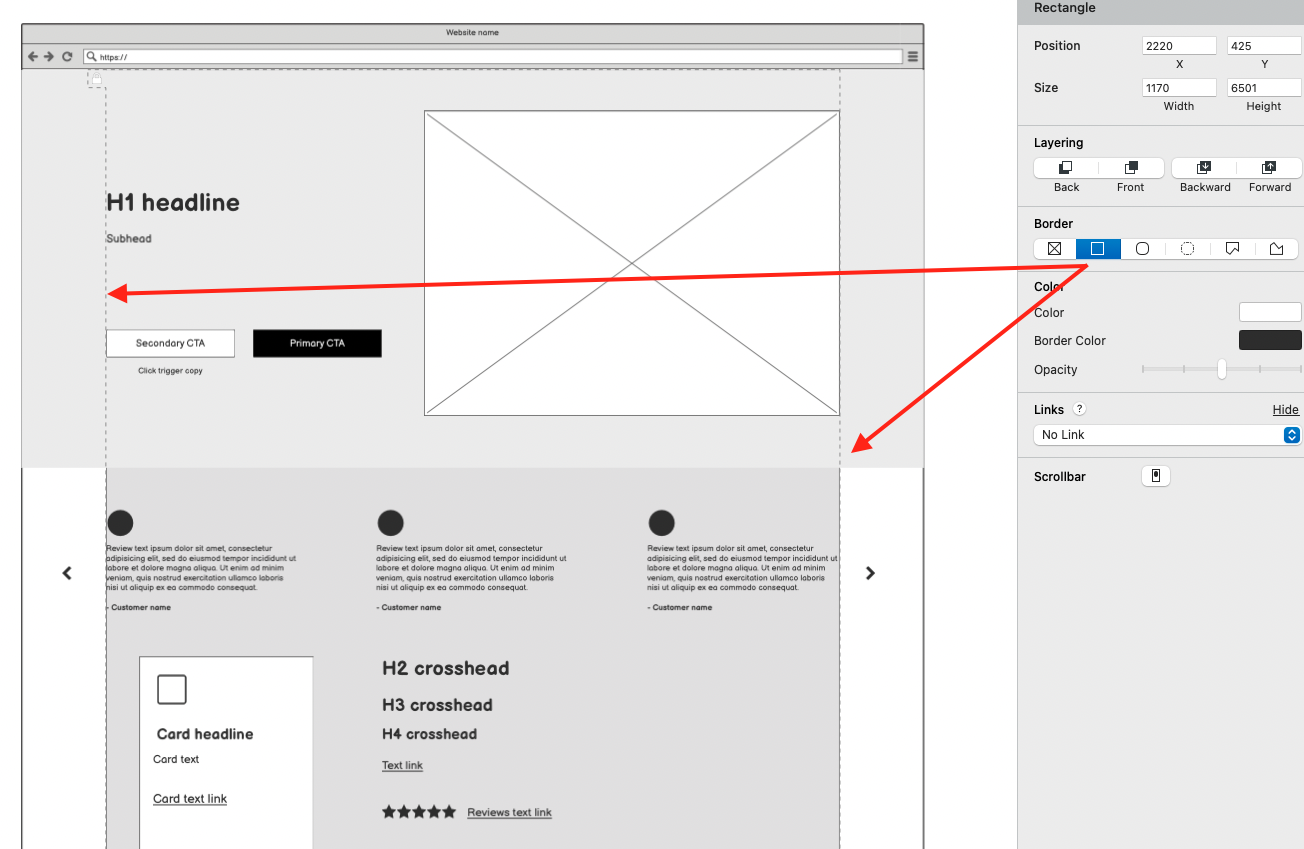
This container will help you make the copy easier to read and neatly organized.
Also keep in mind that for good readability, your sentence length should be no more than 75 characters (50-60 is ideal). A quick trick to always check this in your wireframes is to have this string handy to copy-paste:
"abcdefghijklmnopqrstuvwxyzabcdefghijklmnopqrstuvwxyzabcdefghijklmnopqrstuvwxyz"
3 alphabets are 78 characters, so always make sure that at your font size/style, your line is shorter than that.
If you’re brave enough, you can also create the mobile version of your wireframes. This requires more practice and learning about responsive design, but it’s insanely valuable for designers. I usually do it, especially when I know the client’s traffic comes for the most part from mobile devices.
Remember, our mantra is “remove any guesswork”.
5. Editing
Editing should be part of your writing process. Wireframing makes editing even more efficient and focused.
That’s because once your copy is inside wireframes, you’ll clearly see which pieces are too long or which don’t flow well. The formatting and sizing constraints you gave yourself when creating these basic designs act as signposts for your editing process.
The rule of thumb here is to avoid changing styles or trying to force your copy where it clearly doesn’t fit. If you think it needs rewording, this is the best time and place to do it.


6. Add your notes
You've got your nice-looking wireframe and powerful, research-backed copy ready to show.
Before you do that, let's make these wireframes objection- and revision-proof.
At this point you want to add any notes on your thought process or questions you'd like others’ input on, to the wireframes.
It's just a matter of clearly and concisely explaining your decisions and when necessary, referring to the research that drove them.
7. Presenting your wireframes live
You might think this is an optional step, but I would highly recommend you to go through it. Presenting your wireframes on a live call with your team members and execs, will allow you to shortcut the approval process and also give you the chance to really dig deep into the why behind your decisions.
If you've done the work, you should be confident about it and this is your chance to prove it.
Real copy > dummy copy
Wireframing is not only a great way for you to make sure your hard work gets implemented the way you planned it, but it's also the best way to bridge the gap between copy and design.
And in turn make the Internet a better place.
Designers should design with difficult data. And what's better than real, research-backed copy for it?
 By Christopher Silvestri, Conversion Designer & Copywriter. Questions or feedback? Connect with him on X or LinkedIn.


